Accessing isolated network estate on AWS: Part 2 - AWS Systems Manager Session Manager
Secure and audited bastion solution
In this post we will talk about creating a bastion host that can be used as a jump box but with an added twist, it is not reachable and has no access to the internet. We will be accessing it solely through the AWS Systems Manager Session Manager.
Let’s get directly into the advantages:
Advantages
Reduced operational complexity
No more need to manage SSH keys and their lifecycle. No requirement to add/remove people from SSH agent when they join/leave. No need to worry about them being compromised.
Enhanced Security
Leverages AWS Identity and Access Management (IAM) for access control. To start a session with an instance, a user needs IAM permissions. This model integrates well with your existing policies and procedures for IAM.
Without internet connectivity, our Bastion Host is insulated from potential external attacks. The access via Session Manager further fortifies its security, as it negates the need for managing SSH keys.
The security footprint is smaller as there is no WAN port that is continously scanned with failed login attempts spamming the server logs.
Audit and Compliance
AWS Systems Manager Session Manager logs all session activity, making it easier to maintain an audit trail and comply with governance and regulatory requirements. This means every connection and command is audited and logged in CloudWatch/S3/CloudTrail as configured by you.
Cost-Effective
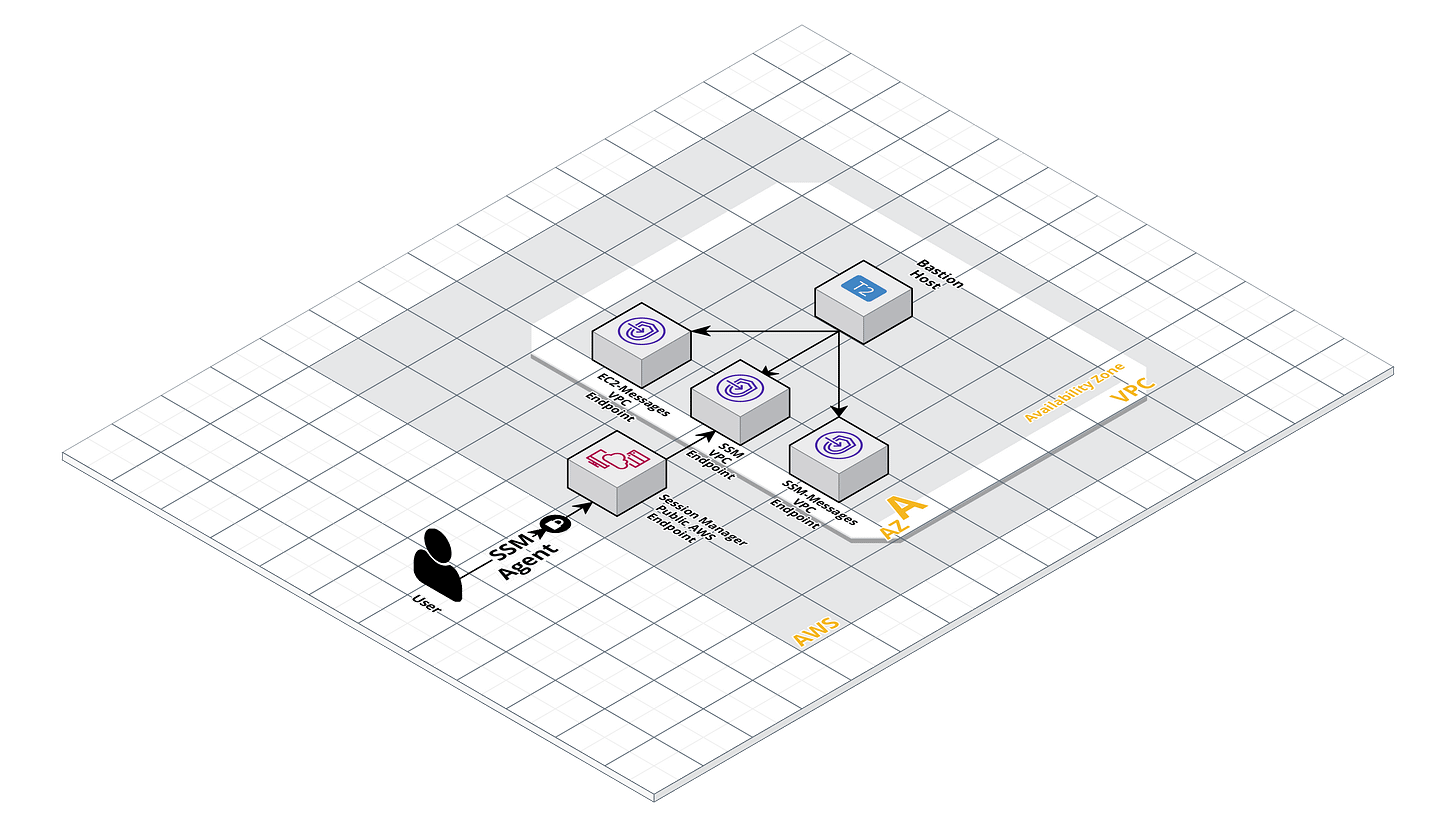
Since there is no need for an Elastic IP or an Load Balancer, we save on costs associated with them, which is non-trivial given the usual 24/7 running of these resources. As you can see in the above architectural diagram, besides the VPC Endpoints and the EC2 instance, there are no other resources needed for a MVP. Ideally for more advanced, stable setups you would use a Spot Fleet to ensure the livelyness of the bastion host.
Disadvantages
Dependency
This relies exclusively on AWS Systems Manager, making us susceptible to potential service disruptions when there are issues on AWS with the service.
Limited Network Testing
Lack of internet connectivity may limit certain network diagnostic capabilities. But if this is needed on an ad-hoc basis, it can be added in and removed once done.
How it works
In order to get this working, we need any Linux distribution that supports the SSM Session Manager agent to be installed. Alternatively, you can use a more recent AMI that has the agent already baked in such as a recent ECS-Optimized AWS managed AMI.
The way Session Manager works is by establishing a secure, bidirectional, and authenticated channel for communications between our terminal and the managed instance, without the need for an open inbound port or to maintain SSH keys via the agent.
The SSM Agent process runs on the EC2 instances and communicates with the Systems Manager service. When a Session Manager session is initiated, the SSM Agent establishes a WebSocket connection with the Systems Manager service, facilitated by the Amazon Message Delivery Service. The WebSocket connection acts as a conduit for command-and-control (C2) interactions, enabling you to run commands, scripts, or even PowerShell cmdlets interactively on the instance.
All the data transmitted during a Session Manager session is encrypted using Transport Layer Security (TLS) 1.2. The communications traverse through the Amazon network backbone, eliminating exposure to the public internet.
You need to install the Session Manager plugin on your local machine so the AWS CLI can leverage it when setting up the connection. The installation steps can be found here.
Example
Step 1: Initialize the CDK App
First, we need to initialize a new CDK app in our preferred language, which for me is currently TypeScript. Let’s open up a terminal and run the following commands to get started:
mkdir -p accessing-isolated-network/bastion-ssm
cd accessing-isolated-network-access/bastion-ssm
npx cdk init app --language=typescript
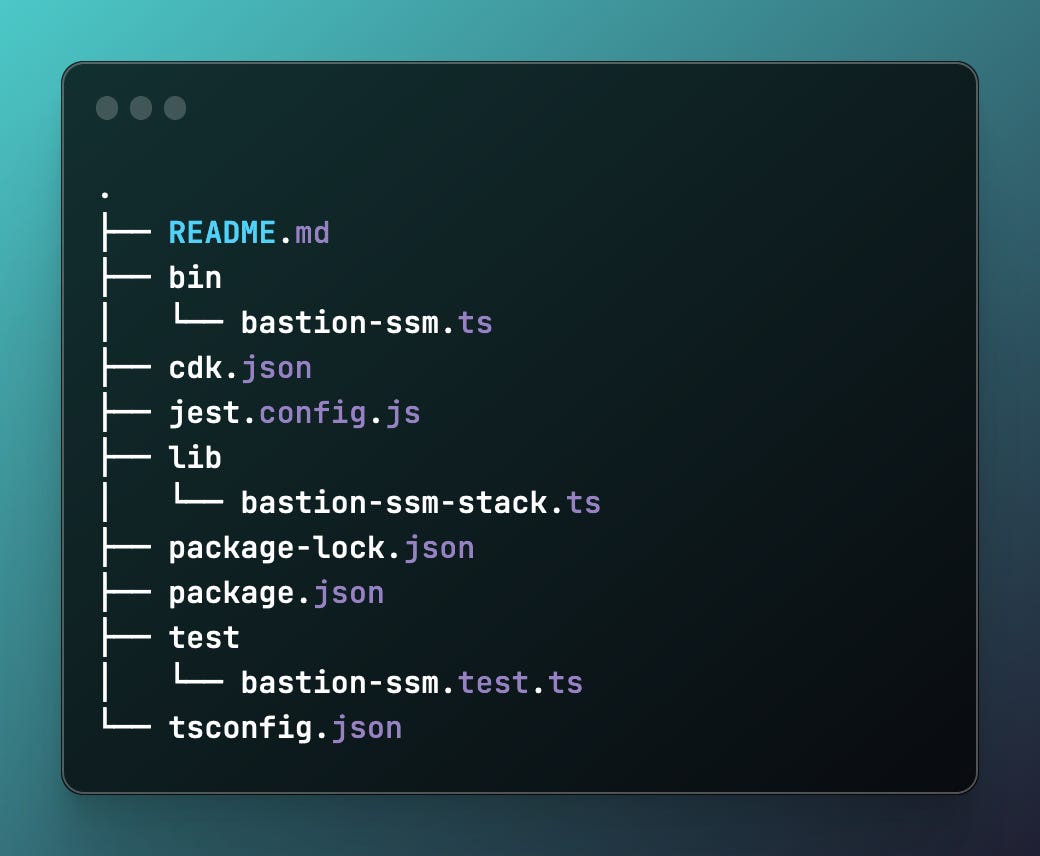
This will create a new CDK app in TypeScript with the following structure
Step 2: Define the VPC Stack
Next, we define the VPC stack where the EC2 instance will be deployed.
Open up the lib folder and create a new file called vpc-stack.ts. We will only need a single public subnet. Of course for actual use-cases you will have more subnets and ideally many of them private ;) but for simplicity we will only focus on the topic at hand.
As you can see we create VPC Endpoint for SSM, SSM-Messages and EC2-Messages. This is required as the SSM Session Manager requires to communicate with all 3 endpoints in order for the connection to function properly.
Step 3: Define the Bastion EC2 Stack
We now create the standard EC2 instance running Amazon Linux 3 (see supported operating systems here.)
Note
Depending on the configurations done to your account, the following error may occur:
To fix this you need to go and disable Systems Manager > Session Manager > Preferences > Edit > “Enable Run As support for Linux instances” in the AWS Console for the target account.
Step 4: Define the App Stack
Deploying this stack is done via the main of:
Step 5: Deploy app
> AWS_PROFILE=<profile> npx cdk deploy --allNow any command in this terminal session will be recorded and logged in S3/Cloudwatch if configured in Systems Manager > Session Manager > Preferences > Edit > CloudWatch/S3 logging.
Step 6: Cleanup
Now that we have created all the needed resources and have gained access within the estate, time to delete all the resources to avoid accruing unwanted charges to our account:
> npx cdk destroy --allIn the following post we will use a more advanced, “serverless” offering from AWS where we will leverage Docker containers for our bastion operating system and ECS Fargate for hosting and running. More details regarding the benefits for this feature in the next post.
You can find the entire codebase for the above example in my GitHub repo here.


